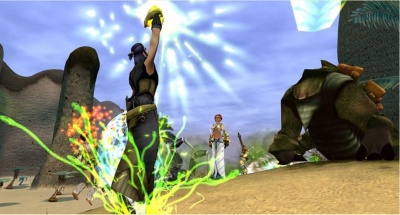
(Как вы это сделаете, будет зависеть от вашей операционной системы; следуйте инструкциям на http://ryzom.com .)
Для игры в Ryzom требуется активная игровая учетная запись. На главном экране входа нажмите СОЗДАТЬ АККАУНТ.
Следуйте инструкциям, чтобы создать учетную запись и пароль на главном международном сервере.
Оба должны состоять из 5–12 символов нижнего регистра и цифр.
Никакие символы не могут быть использованы.
Созданное вами здесь «имя пользователя» будет вашим публичным именем в официальной учетной записи.
Имя вашего аватара будет выбрано позже.
Нажмите кнопку «Отправить», когда закончите.
Прежде чем вы сможете играть в Ryzom, вам необходимо создать аватар, который будет представлять вас на Atys.
После входа на главный сервер у вас будут открыты пять слотов для создания новых аватаров, которые отображаются в левой части экрана в виде больших вопросительных знаков.
Чтобы начать создание нового аватара, выберите один из открытых слотов для аватара и нажмите кнопку «Создать новый» в правом нижнем углу экрана.
Ваша цивилизация будет определять ваш базовый внешний вид, вашу первоначальную репутацию среди различных игровых фракций и начальные навыки создания расы, которые вы будете использовать.
Ваш выбор цивилизации не будет ограничивать области, в которых вы можете путешествовать, или то, какие навыки вы можете в конечном итоге освоить.
Ваш пол изменит ваш внешний вид, но в остальном не повлияет на игровой процесс.
После того, как вы выбрали пол своего аватара, перейдите к следующему шагу в столбце слева.
С помощью ползунков настройте форму тела вашего аватара.
Вы можете вращать свой аватар, щелкая и перетаскивая левую кнопку мыши, а также увеличивать/уменьшать масштаб, щелкая и перетаскивая правой кнопкой мыши.
Ваш внешний вид не повлияет на статистику вашего аватара.
После того, как вы определились с внешним видом своего аватара, переходите к следующему шагу.
С помощью ползунков настройте лицо своего аватара.
Разные цивилизации и полы будут иметь здесь разные возможности настройки.
Вы можете вращать голову своего аватара, щелкая и перетаскивая левой кнопкой мыши, а также увеличивать/уменьшать масштаб, щелкая и перетаскивая правой кнопкой мыши.
Закончив настройку лица своего аватара, перейдите к последнему шагу в левом столбце.
Ваш выбор здесь определит первоначальный набор снаряжения и действий вашего аватара.
Независимо от того, что вы выберете, ваш аватар начнет с первого уровня во всех ветках навыков и сможет одинаково продвигаться в любом навыке, который вы выберете.
С помощью ползунков настройте исходный пакет действий вашего аватара.
Раса вашего аватара влияет на вашу известность среди других рас и двух сил: Ками и Каравана.
У каждой расы есть любимая раса и раса, которая им не нравится.
Каждая раса изначально рассматривается одной из держав более благосклонно; Трайкеры и Матис пользуются благосклонностью Караванов, а Зораи и Файрос — благосклонностью Ками.
Эти начальные оценки славы варьируются от +20 до -20 по шкале +/- 100.
Эти первоначальные оценки не заставляют вас присоединяться к какой-либо нации или державе; вы можете плыть по течению или бороться с ним.
Вы не сможете достичь соответствия с державой или нацией, пока не доберетесь до материка, не заработаете больше славы и не проведете обряды.
Рекомендуется хорошенько подумать по этому поводу. Это не является необратимым, но его трудно повернуть вспять.
Как только вы объединитесь, это повлияет на то, к каким гильдиям вы сможете присоединиться, какие алтари телепортации вы сможете использовать и какие игроки смогут зарабатывать очки PvP, сражаясь против вас.
Это также повлияет на то, на какой стороне люди ожидают, что вы будете сражаться в битвах за заставу.
Анимируйте готовый аватар с помощью кнопки со стрелкой в левом нижнем углу экрана.
Просмотрите свою расу, пол, цивилизацию и первоначальные действия; затем нажмите кнопку «Готово» в правом нижнем углу экрана.
Если отображается, нажмите «ОК», чтобы выбрать мировое сообщество Atys.
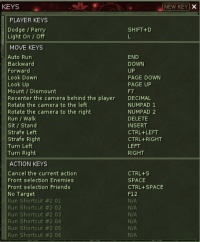
Далее, выберите конфигурацию клавиш; большинство современных пользователей компьютеров предпочтут перемещение клавишам со стрелками (вместе с мышью или трекболом).
Последний шаг для вашего аватара - выбор имени.
Каждое имя на Атисе должно быть уникальным, поэтому для выбора имени может потребоваться несколько попыток.
Имена должны соответствовать Кодексу поведения Ryzom.
Как только ваше имя будет принято, вы увидите свой новый аватар в слоте слева.
Выберите «ИГРАТЬ», чтобы начать игру на острове Силан.
Нажмите на Chiang the Strong, чтобы начать свою первую ознакомительную миссию.
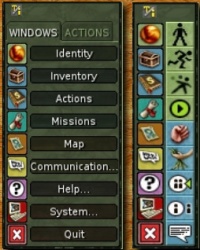
При нажатии на второй значок на вкладке ОКНА панели задач появится окно инвентаря.
В основном окне есть две вкладки: СУМКА и СНАРЯЖЕНИЕ.
Сумка — это все, что вы носите, а СНАРЯЖЕНИЕ — это украшения и доспехи, которые вы носите.
Если вы купите крепление и упаковщик мектуба, они появятся на отдельных вкладках как MOUNT1 и PACK2.
Кроме того, если вы присоединились к гильдии, у которой есть аванпост, и находитесь рядом с этим аванпостом, в инвентаре появится новая вкладка.
Это будет ГИЛЬДИЯ и будет содержать все содержимое зала гильдии.
Вы также увидите вкладку «Гильдия», когда находитесь в зале гильдии.
Таким же образом это будет КОМНАТА со всем содержимым вашей квартиры, видимым, когда вы в ней находитесь (см. ниже).
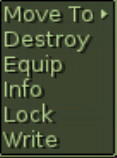
Если вы не хотите случайно потерять свои предметы, уничтожив или продав их, выберите функции блокировки/разблокировки, вызываемые правой кнопкой мыши.
Рекомендуется хранить самые ценные предметы, доспехи и оружие запертыми.
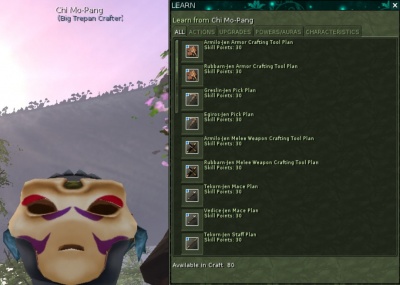
Действия можно приобрести у любого из тренеров.
При изучении действия полный набор рута, опций и кредитов будет получен в виде значка.
Этот значок может заменить предыдущую версию более низкого действия.
Однако если приобретается улучшение, особенно у тренеров по магии, то будет куплена только опция или только кредит.
Каждый из них разместит значок на панели задач, который можно удалить.
Затем необходимо отредактировать, выбрав значок действия и щелкнув правой кнопкой мыши вариант «Редактировать действие», чтобы открыть окно редактирования.
Там индивидуальную опцию или кредитный «кирпич» можно обновить до вновь изученного апгрейда, нажав на него.
Имя значка также необходимо изменить вручную на обновленную версию.
Это позволит избежать путаницы, поскольку тренер по-прежнему может сохранить все действия для этого улучшения, включая кредиты, которых у вас может не быть.
Однако цена в очках навыков изменится, чтобы отражать ценность только тех «кирпичиков» или «станз», которыми вы еще не владеете.
Невозможно «тратить» очки навыков; как только у вас будут все "кирпичики" для определенного действия, оно будет удалено из трейнера.
Всплывающие окна
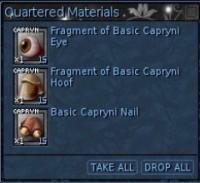
Окно лута
После убийства на курсоре при наведении на него появится опция.
В этом сообщении будет написано «Добыча» для примитива или «Трофей» для МОБа.
Появится небольшое окно Quartered Materials с добычей от этого убийства, которая каждый раз будет меняться.
Отдельные элементы можно выбрать, щелкнув каждый элемент мышью, а затем выбрав «Удалить все».
Всю добычу можно собрать, нажав «Забрать все».
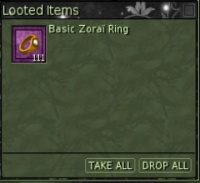
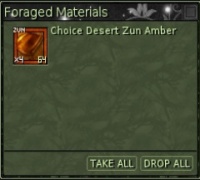
Окно добычи
После начала добычи на рабочем столе появится окно добычи.
Он покажет добытый предмет, а также количество и качество этого предмета.
После завершения извлечения можно выбрать варианты «Взять все» и «Удалить все».
В любой момент можно выбрать «Отбросить все», чтобы прервать извлечение.
Эти окна могут появляться и в других случаях, например, когда NPC предлагает вам награду.
Предупреждающие значки
На экране появятся небольшие значки предупреждений, предупреждающие вас о любом заклинании, катализаторе или смертной казни, которые могут вас затронуть.
Если мектуб умрет, появится увеличенное изображение черепа и скрещенных костей.
Он сообщит вам, сколько времени осталось, чтобы забрать свои вещи из мектуба, прежде чем они разложится.
Наведя указатель мыши на значок, вы получите дополнительную информацию о функции и статусе этого значка.
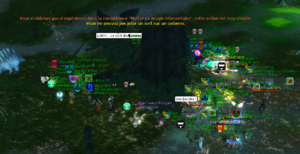
Иногда отображаются системные сообщения (не в окне)
Окно битвы за заставу
При входе на территорию спорного аванпоста на короткое время откроется окно, предупреждающее игрока об этой ситуации.
Игрок должен выбрать АТАКУ, ЗАЩИТУ или НЕЙТРАЛЬНО.
Если ни один из них не выбран, аватар не будет помечен и останется нейтральным.
Нейтральных наблюдателей нельзя атаковать и они не могут лечить во время боя.
Они должны оставаться нейтральными наблюдателями, и их могут попросить уйти, если они повлияют на ситуацию.
Missions
На Силане (учебная карта, когда вы только создаете персонажа) пройдите первую миссию с Chiang (в лагере, на холме), затем с тренерами.
На протяжении всего Ryzom можно выполнять небольшие миссии.
Дающими миссии являются гостеприимные люди в каждом городе, поставщики, капитаны, сержанты, капралы, послы и многие другие.
За эти миссии иногда платят очки славы, очки расы или депперы.
Большинство из них можно принимать несколько раз после периода охлаждения.
На материке подробнее о Квесты и обряды.
Торговцы
В Атисе есть броня, сырье, оружие, ювелирные изделия, разносчики, расходные материалы, конюхи и несколько других типов торговцев.
Все они купят ваш товар.
Однако то, что продается в одной стране, невозможно купить в другой.
Например, меч, выставленный на продажу в Пайре (Пустыня), недоступен для покупки игроками в Йркранисе (Лес).
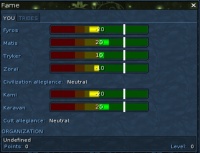
Во время путешествия вы можете захотеть купить новую броню или заменить кирку. Если ваша слава не очень хороша среди определенной расы торговцев, то ожидайте, что заплатите больше, а получите меньше.
Проверьте известность в Панели задач > Связь > СЛАВА > ВЫ (Shift+F).
Мектубы
Бесплатные игроки могут приобрести одного мектуб-маунта.
Подписавшиеся игроки могут приобрести три вьючных и ездовое животное, в общем количестве четыре мектуба.
На продвинутых уровнях вьючные очень полезны собирателям и ремесленникам.
Мектубов необходимо кормить, поэтому, если вам предстоит дальний путь, обязательно купите еду у конюха и переложите ее на каждое животное.
В противном случае отведите мектуба в ближайшую конюшню и дайте команду «Войти в конюшню» из окна животного.
План кормления можно приобрести у конюха (дешевле, чем тюки с кормом).
Животное, содержащееся в конюшне, прослужит неопределенно долго.
Маунты могут отправиться с вами в другие земли.
Они должны войти в ворота за вами (подав команду «следуй за мной»).
Однако будьте осторожны; их можно убить.
Маунт может быть убит МОБами (даже такими низкими, как рычащие гинго), если вы на нем сидите.
Если мектуб умрет, вы увидите значок черепа на экране, сообщающий вам, сколько времени осталось для выгрузки переносимых предметов, прежде чем мектуб исчезнет.
Вы не можете ни исцелить, ни воскресить мертвого мектуба магическим способом.
Смерть и наказание
Убитый персонаж может быть воскрешен другим посредством произнесения (при необходимости повторения) последним исцеляющих заклинаний (если таковые имеются). Если смерть произошла во время одиночного приключения, вы можете запросить это «воскрешение» (или rez), отправив /tell одному из ваших друзей или передав сообщение о бедствии на канале «РЕГИОН». сообщение, в котором вы укажете свою позицию и время, оставшееся до принудительного воскрешения вашего персонажа. Такой вызов о помощи по каналу ВСЕЛЕННАЯ рекомендуется отправлять только в том случае, если в регионе никого нет (см. команду «/who», описанную выше).
Если, наконец, нет спасителя, доступного или достаточно близкого к вашему персонажу, чтобы вовремя поднять его, вы все равно можете либо выбрать место своего принудительного воскрешения на карте, отображаемой в момент вашего падения, либо активировать (также известное как разрыв) договор о телепортации к алтарю по вашему выбору. В обоих случаях ваш персонаж окажется в выбранном месте живым, но со «смертной казнью» (или ДП). Этот штраф запрещает вам накапливать очки опыта («XP»), которые обычно зарабатываются вашими действиями: эти очки затем используются для исчерпания штрафа. На более низких уровнях исчерпать штраф довольно легко, но на более высоких уровнях многие игроки исчерпывают его во время тренировки - действия, которое дает правильный опыт, не подвергаясь слишком большому риску дополнительного PD. Кроме того, алтари продают услугу, значительно увеличивающую скорость истощения ПД: «Дыхание Ма-Дука» или «Поцелуй Джены».
Временное отсутствие Если вам нужно отойти от компьютера и вы хотите предотвратить нападение на вашего персонажа во время вашего отсутствия, отведите его в безопасное место (например, возле стены или в воде), затем введите команду /afk в выбранном вами окне чата: анимация вашего персонажа приостановится, и вокруг него будут подниматься легкие спирали, пока вы не вернетесь . Если вы хотите сообщить возможные собеседникам более подробную информацию, просто наберите, например, /afk «Аватар должен был ответить на звонок». Тот, кто затем отправит вам /tell Привет, Аватар! получит в ответ сообщение «Аватару пришлось ответить на звонок».
Телепортация
Быстрое путешествие
На Chiang the Strong может организовать для вас телепортацию на северную оконечность острова.
К сожалению, вам придется бежать обратно в лагерь рейнджеров, так как обратного ТП нет.
На материке есть много мест, куда можно пойти, но вначале вам будет сложно выжить, чтобы добраться до них.
Может быть полезно отправиться с несколькими мастерами в каждый город и к некоторым промежуточным алтарям телепорта.
Там вы можете купить пакты телепортации для своего аватара, чтобы в будущем стало возможным быстрое путешествие в далекие страны.
С самого начала вы не сможете купить все пакты о телепортации.
У некоторых есть требования мировоззрения и даже очень высокой известности у Ками или Каравана.
Смерть и смертная казнь
Когда вы умрете, вы можете быть воскрешены (восстановлены) другим игроком, наложившим на вас исцеляющие заклинания.
Попросите помощи через /tell друзьям или сообщением в канале РЕГИОН (укажите, где вы находитесь и сколько у вас осталось времени).
Если в регионе никого нет (используйте /who), то можно задать вопрос в канале ВСЕЛЕННАЯ.
В противном случае вы можете выбрать место возрождения на всплывающей карте или использовать договор о телепортации в своем инвентаре, чтобы выбрать алтарь.
В этот момент вас ждет смертная казнь.
Это удерживает вас от накопления опыта за ваши действия. Вместо этого опыт будет работать за счет вашего дп.
На более низких уровнях от dp очень легко избавиться.
На более высоких уровнях большинство игроков справляются с этим сбором урожая, что дает приличный опыт с низким риском получить еще больше dp.
Алтари предлагают покупки Дыхания Ма-Дука или Поцелуя Джены, которые со временем увеличивают падение дп.
Going Offline
Если вам нужно отойти от компьютера, но вы не хотите, чтобы на вас напали, перейдите в безопасное место, например, возле стены или в воде.
Затем введите /afk в строке сообщения.
Вы впадете в анабиоз, и вас будут окружать искры, пока вы не вернетесь.
Если вы хотите оставить более подробную информацию, просто введите /afk Dummy должен пойти в ванную.
Любой, кто наберет команду "/tell Dummy Hi" , получит сообщение.
Транспортеры
«Транспортеры New Horizon» перемещают аватары в любой город региона.
Они возьмут 3000 депперов, если ваша известность в этой расе не превысит «43».
Если да, то вас перевезут бесплатно.
Доступен другой выбор: помочь Перевозчику.
Это отличный способ заработать депперов для себя.
У четырех профессий есть особая особенность: вы можете продавать свои товары транспортерам New Horizons за депперы, и, если ваша расовая известность достаточно высока (вы известны и можете перевозить бесплатно), вы также получите очки цивилизации.
Их вы можете потратить у официального торговца на специальные предметы.
Foraging
Foraging is generally practiced in light armor, however, some strip their armor and forage nude or in minimal medium armor.
You want to balance explosion protection with focus drain due to malus.
The default extraction action in forage should be the first leftmost icon in the action bar.
If you have multiple forage/extraction actions, the double-click will activate only the leftmost icon.
You probably want to set your default defensive move to Dodge while foraging.
Many players organize their action bars by activity, such as all fight icons on #1, all magic on #2, all craft on #3, all forage on #4, etc.
This arrangement can be changed at any time via cut and paste operations on the icons.
Foraging is best done with a partner.
Occasionally you are killed while harvesting, so a partner can rez you.
Later on, one person can extract whilst the other does actions to increase stability and source life (care-planning).
Then the node will give more materials and it will prevent unfortunate dying.
When you find a mat, or sometimes several in one close area, it is a good idea to use the map to mark that location.
Later, you can right-click the little flag and set that in your compass.
Then your compass will guide you straight to the mats.
A pick must be equipped to prospect and forage.
Since each deposit has a maximum level (shown in the SYS. INFO tab) the pick is required to be of the same level.
Greslin picks reduce chance of explosion/gas and egiros has a chance of doubling an extraction yield while colored ones are the faction picks with a
focus/hp boost and; all have the same durability.
Picks break frequently (approximately every 5500 mats) don't get caught without a spare! Picks may be found at the tool merchant, the official race merchant,
or obtained from other high-level player/avatars.
Materials are available in the qualities of basic, fine, choice, excellent, and supreme.
Digging better materials of the best q you can will result in the gain of more forage experience points per material harvested.
Crafting
Craft in as little light armour as possible.
When you reach a new x10 level (i.e. 20, 30, 40, 50, etc.) you will be able to buy up the next level in that craft line.
The first thing you should do is edit that action to include the HP, Stam, Sap, or Focus boost attributes that you have gained, so they will be included in all your products.
Bulk can be the problem (the line indicator on your bag inventory), especially for weapons and armour.
Sell, destroy or exchange your low q items before crafting.
It is suggested that you sell your crafted items to the merchant or to other players to accumulate dappers.
Money is always good, no matter how little it seems.
Crafting in the game of Ryzom can be quite complicated.
For example, an inherently slower weapon (e.g. a weapon that has a relatively low maximum possible speed value), if made well and with the right materials, can be faster than an inherently faster weapon made with mediocre materials.
Each weapon has a maximum and minimum possible speed, damage, durability, dodge, parry, etc.
From these values and a little guess work, one can estimate what an item's attribute will be post-craft knowing the pre-craft values shown in the crafting window.
The crafted item cannot be a higher quality (q) than your lowest q component.
Sometimes using superior components can lower the stats of the final product.
Also, you will get a lower level product if you have a failure due to low success rate.
To vary the component materials in a craft recipe, add a material to the plan, then click on it again.
A SELECT QUANTITY window will pop-up so you can change the number of pieces of that material so you can add another.
The final recipes can be saved by shift+w>Ryzom>Craft:Recipe-Book>New recipe or by writing it into your notebook.
After a product is produced, add your logo.
This is accomplished by creating a plain text file with your logo.
Then right-click your crafted item and select WRITE.
Copy and paste (<ctrl> v) into the box. Now, your logo will not look correct, so modify your text file
with spaces or delete spaces until it looks right — in the items info window — not just that
write box. (This should be done only for exceptional results – it's your fame on the line.)
There are certain tools needed for crafting. They must be sized according to the level of products made.
When they either wear out or break, a new one must be purchased from the Tool Merchant.
Nothing can be repaired on Atys.
Remember, everything is full strength or capability until it's hit points reach a value of one.
Racial Plans
When you start your avatar on Silan, it has plans of its own race.
The materials there will craft any item for any avatar.
On the mainland, however, your race plan needs the local materials if they are higher than fine or basic.
For example to make a matis medium quality sword from choice or higher materials, forest materials must be used.
The only exceptions are materials foraged from the prime roots that can be used for any race craft.
Armour is crafted as LA, MA, or HA.
It is usually provided to another player as a full set of armor that are color, quality, and level matched.
Therefore, the crafter should obtain all the plans for a suit of armor.
For weapons, pick a single weapon such as 2h sword, 2h axe, or 2h pike and get very good at that one thing.
Specialize! High q items with good stats will be most desirable and sell the best.
Jewellery is crafted in sets of 6 pieces and combine protections against the 7 types of elemental damage, along with resistances to a spell against you.
Since jewellery has no malus, every player wears full sets of jewelry, magically boosted with the desired trait, for example, foragers need focus-boosted jewels.
The art of jewellery is to craft combinations that sum their effects to the benefit of the avatar.
As the crafter progresses in skill, they can purchase medium quality, high quality, and finally specialized designs such as the fiery Fryos swords as first seen on Silan.
The use of these plans affects only one characteristic of the item – the durability!
The plans with the animated racial effects have the same durability and take the same amount of mats to make as a comparable high quality item.
Generic Plans
Generic plans may be obtained from certain missions.
These plans produce a plain weapon with an interesting characteristic.
Normal items are made from race plans and race materials only, but gray generic plans can utilize any materials from any area of any race, as can the outpost plans and special plans.
Special Plans
The special craft trainers are called the Big Trepan and Tree Bore specialists, located in the capital cities.
They will train on a number of special plans that have no further upgrades.
It is not recommended that you invest in these plans early on, until you are level 200+.
The reason for this is that the special plans all use rare materials drilled from Outposts.
These materials are greslin, armilo, erigos, and rubbarn for tools and tekorn, maga, vedice, and cheng for weapons.
The finished tools are powerful and the finished weapons are beautiful and lethal, but should only be produced by seasoned crafters due to the difficulty in getting the materials.
Restoration Specialists
The restoration specialists located in each capital city are part of high level content.
They will only function if your avatar has NPC boss plans.
Tool Crafting
However, tool crafting is altogether different. Tool crafting is done with outpost materials exclusively.
Normal tools are not made.
Specialist trainers sell the special tool plans and most guild High Officers have and can craft these plans.
It is not recommended for low level crafters to learn tool crafting.
Materials
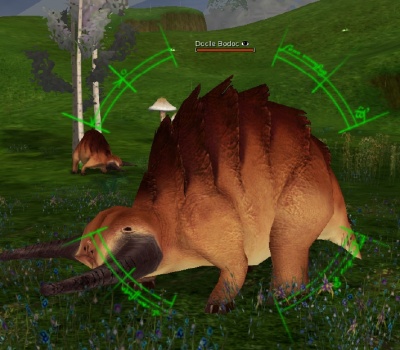
The quality of the materials you quarter from a mob is the same as its level (for example, q5 materials from a suckling white yubo or q8 materials from an inexperienced 1* green yubo).
Most are basic mats, but some are of fine quality identical to the MOB's level.
Destroyer MOBs drop choice mats, Named MOBs drop excellent mats, and bosses drop supreme mats.
Foraged materials are found in the same maximum quality as the region level.
So, in a q150 area all mats are capable of being harvested up to q150.
Materials may deliberately be dug in all grades; basic, fine, choice, excellent, or supreme.
Supreme foraged materials are only available in the Prime Roots.
Crafting with better materials will improve the product.
Crafting experience points are only controlled by the number of materials used, your avatar's skill level, and the level of the crafted item, not by the nature of the materials used.
Enchanting weapons
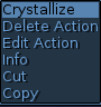
When right-clicking on a spell, you may see an option to Crystallize.
This is for enchanting weapons.
A spell may be crystallized and added to your inventory.
Then while holding a weapon in the right hand, right-click the crystal and select Enchant Right Hand.
This will enchant the weapon.
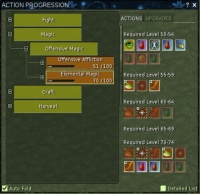
The icon Use Enchanted Item can be dragged to the Action Bars from the Action Progression window for Fight if it is lost, and will cast the enchantment when clicked with a mouse.
The weapon must then be charged with Sap, accomplished via the Sap Recharge spell, learned from the magic trainer.
Alternatively, one can purchase Sap Crystals from special national merchants and use them to recharge the weapon by right-clicking on them and choosing Recharge Right Hand.
Grinding
Grinding involves the mass crafting of items with the goal of raising your skill level.
The finished products are either sold to merchants or sold to others or destroyed (not recommended).
At the appropriate merchant, check what other RESALE items of your type are listed.
When you sell your item, adjust the percentage at the top of the SELL screen to get the price you want for your labor and time.
Usually you will sell your degraded items directly to the merchant and list only the normal items (i.e. multiples of 10) for sale to others.
Keep an eye out for bargains in the RESALE tab as well; it's good business.
More on crafting.
Fighting
Training and Hunting
To raise the skill level in fighting or magic, it is wise to practice.
Plants are targets of choice because they are plentiful and easy to run from – if things go wrong!
The maximum experience points are set at 3000.
Select an enemy that is 20 levels above your own to get the maximum experience points per kill.
Fighting weaker MOBs results in -200 xp per level below your own.
Small enemies do not give any experience points and are a nuisance.
Hunting named creatures and bosses is generally performed in groups as described below.
Weapons
Daggers can be used in both hands, and combined, are the fastest of all weapons.
They count as close-combat weapons like fists and amps.
One-handed weapons include sword, axe, mace, baton, and spear.
These can be used with a shield or buckler in the left hand for improved protections if dressed in LA or MA, particularly.
Two-handed swords are a common standard weapon and are medium damage and medium speed.
Axes and Maces give more damage than swords, with nearly the speed.
Pikes are interesting in that they have a longer reach, reducing the ability of superior MOBs to hurt by 10%.
They give less damage than other two-handed weapons, but have the greatest speed.
Range weapons can ultimately hit with the highest damage of any melee weapon.
They can deliver damage from a safe distance--until your avatar is out of ammunition.
Therefore, one should keep a backup weapon in the bag.
Weapons
Choose the best weapon by examining the weapon's characteristics, found in the right-click INFO choice on each weapon.
If you cannot see the values, grab the weapon with your mouse and move it.
Multiply the damage by the speed to get the damage/min inflicted on your enemy.
The more damage the better.
Note that damage is the only factor on melee weapons that is affected by the level of the weapon, meaning that a higher level weapon is capable of more damage per hit.
It is important to seek values for Dodge, Parry, Adversary Dodge, and Adversary Parry that are as high as possible--highly positive for you, highly negative for your adversary.
These values add to your defence and add to the adversary defence! Pick a weapon that looks good and you like using.
Any weapon can be made great with the right materials and a good crafter.
Weapons can be held at the strength +10 level.
Tip: Lightweight weapons consume less stamina.
Special stanzas can be learned for each weapon type.
Specifically, bleed for slashing weapons, slow attack for smashing weapons, ignore armour for piercing weapons, and hit rate for range weapons.
Create battle actions with custom stanzas
These seem expensive, but are much cheaper than the damage caused by a MOB in a long drawn-out battle.
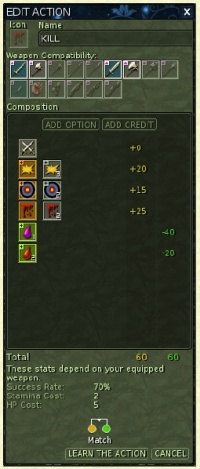
Here is an example of a simple level 40 sword battle action combining the default attack root with increase damage and accurate attack and bleed, balanced with credits:
Battle
On the Task bar ACTIONS tab, in the lower right of the screen, you will see Parry/Dodge.
This is best set to your advantage for combat: to avoid being hit.
Dodge is equal to your highest skill level if you are naked and empty-handed.
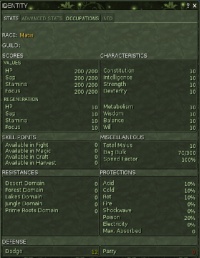
If you equip weapons or armor with non-zero dodge values, they will subtract from or add to the total dodge value displayed at the bottom of the IDENTITY>STATS window.
If the targeted MOB is low-level and your avatar has a high dodge value, then the MOB will hit less.
The chances of a successful dodge or parry will be displayed on a mouse-over of the values on the STATS>DEFENSE window.
It might be best to set Dodge/Parry to Parry if you are fighting with a weapon.
A parry value will be added when you hold the weapon, a value equal to your skill level with that weapon (bare-handed is, of course, your close combat level). Likewise, negative weapon values subtract and positive values add to parry.
Therefore, Parry is weapon-specific.
So you can be a master pike and have 250 dodge and 250 parry with a pike that has +0 dodge and +0
parry. Otherwise, the parry value will equal your current melee level + parry mod on current weapon +
parry mod on all pieces of worn armour.
Dodge & Parry
Some simple relationships emerge, forager armour should be high in dodge, while heavy armour should be high in parry.
Magician armour should be high in dodge, unless the mage has a very high level hand-to-hand skills.
Weapons high in parry will be suited for selecting a parry defence.
But, if you are a high-level forager training low-level melee, for example, you can use dodge to your advantage since parry will be low.
The mage should be dressed completely in light armour (LA) only.
Heavy armour (HA) and helmet malus will degrade magic abilities, for both the sender and the recipient.
Although, some fighters – especially range fighters – and magicians will opt for MA.
The maximum light armour any avatar can wear is her highest skill level + 25.
Medium armour is limited to constitution x1.5 and heavy armour is limited to constitution + 10.
Always don the best armour possible while realizing that small increases in stats probably aren't worth the dappers the armour will cost.
This is determined by examining all the armour’s statistics.
The Dodge or Parry modifiers should be high as possible, depending on usage.
The Protection (protection factor) is the reduction in the actual attack hit provided by that armour from every blow—the purpose of armour.
The slash, smash, and pierce show the protections to those particular attacks.
Likewise, higher numbers are useful here.
Usually passive-magic boosts are added by the maker, but there is no magic protection in armour.
Therefore, it is important to wear good jewellery. Jewellery serves to absorb magic and also provide characteristic boosts, such as hit points or sap.
This will make your avatar more likely to survive in battle.
Outfit your avatar with jewellery with q level up to your highest skill level +25.
Always use acid on beasts, cold on kitins (bugs), and rot on plants.
High level racial spells will be available from trainers at level 125.
Amps are equippable at q=intelligence +10.
Although staffs can hold spells and sap, magic amplifiers will multiply the spell damage by (1+damage bonus) * (1+speed bonus).
Good amps are essential!
MOBs all across Atys have certain resistances to melee and spells.
So, in addition to strengths in speed, damage, parry, dodge, amp multipliers, etc., some MOBs suffer reduced damage or no damage whatsoever from an attack. It would be wise to know the ways of the enemy before attacking.
For instance, try to solo kill a kipucka with a slashing weapon.
Then use a piercing weapon against that same kiupcka, provided you're the same skill level, and killing it will be no problem.
This is because kipuckas are resistant to slash but not resistant to pierce!
To kill a large MOB such as this great kipucka, several formations are commonly used.
The fighter (tank) goes to confront the MOB, while a magician sends healing from a distance.
If there is a strong healer and a weak healer, then the weak healer “back heals” the strong healer's sap and life HP.
Other layers of offensive magicians and defensive fighters may be added.
(Implied, but not stated:team.)
Fighters will proceed to the MOB, one offensive fighter or magician will position mid-way, and the defensive magicians will stay in the rear.
Because, if the attacking fighter dies, the MOB will go straight for the magicians, generally in LA, and kill them.
The mid-way fighter protects the magicians.
Use an enchanted weapon to fire a spell before you attack, to give you the advantage.
Then attack.
(or not – that's only one way to start, and a bad way for bosses since it drags minions.)
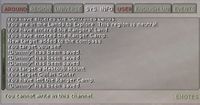
Switch to the SYSTEM INFO channel to see detailed results of your battle.
This window will tell you the body part struck, how many points damaged, etc.
It will tell you how your spells worked, how your battle went, and exactly how you died.
This is invaluable in diagnosing your armour, actions, and attacks.
If you don't like the results, try editing your actions or find a different mob.
City of choice
When you leave the training area of Silan is up to you.
It is recommended that you complete all the missions from the skill training NPCs, plus the missions from the Kami and Karavan representatives and from Chiang the Strong.
Some of these ask you to form teams, but if you can do them solo, it will work.
Others really need teams.
All of these missions yield good experience and many of them yield armour and weapons that are better than anything else in the training area.
(Note: experienced players with friends on the mainland have left Silan at level 1 and survived.
As a new player, don't count on it.)
So it is time to join the rest of the world.
The opportunity is given in the last mission from Chiang the Strong.
You have to choose a city to go to.
The default is the capital city of your race, but if you have friends in game already you may not want to take that option.
It's up to you.
Information: Pyr is in the Desert (Fyros), Yrkanis in the Forest (Matis), Fairhaven in the Lakes (Tryker), and Zora in the Jungle (Zorai).
Guilds
Joining an active guild can greatly speed your avatar development.
There are many guilds of different types and alignments.
Guild halls are accessed through the doorman, at the glowing terminals found it cities and towns, or at any outpost the guild controls.
Any member of the guild may add items to the guild hall, but only high officers and the leader may withdraw items.
Using the G key will display a guild window.
Several sort orders of displayed guild members can be cycled by using right-click with the mouse.
Anyone may start their own guild; all you need is money and desire (a group of friends to be members is a really good idea).
In order to form a guild, you need to find a Guild Clerk NPC.
Guild clerks can be found in the capital cities on the mainland.
Guilds cannot be formed on Silan!
Forming a guild will be the default action at the NPC and will open the Create Guild window.
Within the guild creations window, you will be able to set the name and description of your guild, as well as choose the guild crest and colours.
Once the guild is created, you will not be able to edit these settings, so choose carefully.
Right-click other avatars to add/remove/promote/demote.
If you start a guild of your own, be prepared to spend dappers to start the guild itself (100K), and then spend 5-10 million dappers to purchase a guild hall.
And then you will need an outpost...
Outposts
Outposts are located in most regions, both above and below Atys, Almati Woods being the exception. Outposts can be conquered by a guild, and will produce one type of special outpost material when a drill is placed on them. This outpost material can be used in special receipts to produce items with improved stats or properties compared to the standard armours, tools or weapons.
There are currently no "working" outposts located below Atys.
All outposts capable of drilling special materials are on the surface.
Outposts drill for and yield rare materials and flowers.
The products of outposts are of four types (one type per faction - but that's a purely cosmetic decision):
- purified (Kami)
- modified (Karavan)
- refined (Marauder)
- ??? (Ranger)
Every day or so these produce a single type of material in accordance to the level and material assigned to it during the last outpost material rotation.
Every now and then the drill produces higher quality or lower quality materials than normal.
The OP itself cannot store any mats, so a GH must be owned by the guild prior to construction of the drill.
The materials flow directly into the GH.
These rare materials are used to make the finest weapons and tools on Atys.
This reason is why the guilds fight to possess an outpost.
Owned by guilds, they are attacked and won.
Outpost battles are scheduled and then fought in rounds throughout the course of a day.
Avatars entering a disputed area must pick to either defend or attack the outpost, then join their comrades in battle.
The names and titles over the heads of opposing avatars turn red to identify them.
Generally, offensive and defensive leagues are created using the /league leaguename , /leagueinvite, /leaguequit, and /leaguekick chat commands.
Team leaders then join the league.
The league commander gives battle orders in the new leaguename channel.
Check your UTC/local battle time by typing /time in the AROUND channel.
Outposts' thresholds decrease with time and within 6 months it decreases down to a value between 3 and 5 (depending on region and outpost), representing the lowest number of rounds it takes to win ownership.
Phase one of battle is the attack phase, where the respawning NPC guards are on the side of the current owners.
If the 1st phase is successful (the number of rounds won by the attacker exceeds the threshold), then a 2nd, phase will be held between 24 and 48 hours later where the current owner is the attacker. In this 2nd phase, the guards are on the side of the attacker and the number of rounds won from the first and 2nd phase by the guild which wants to take over the ownership of the outpost must exceed 12 to successfully take over ownership of the outpost.
Each phase consists of 12 rounds of battle, each lasting 5 minutes. With each of the 12 rounds the number of NPC guards spawned increases. And a round is won by the attacker if all NPC guards are killed within the 5 minute window.
There are announcements of who won each round, and then the wins/losses are tallied at the end of the battle to decide who gets control of that outpost.
If victorious, the winning guild is left with a worthless site that must be rebuilt. Options for drilling can be purchased, such as speed and type of drill.
The guild leader purchases a new drill by going to the OP and selecting a spot. Right-clicking on a spot, brings a pop-up window of options for drill types and
speeds.
Drills can run upwards of 5 million dappers.
Quests
Quests are special missions given by the Sages that you will find in each capital city. They consist of a series of about ten missions that are quite long to complete, but reward your character with special items. No quest can be undertaken more than once by the same character. The Sage of Pyr gives you to visit The Revealers of Heroes, the Sage of Yrkanis will launch you on the tracks of the Treasure of Jinovitch, the Sage Tryker of Fairhaven will send you in search of The Dagger of the Lagoons and you will be entrusted to Zora the mission to protect the Nature Under Threat.
Spoilers: see Sage Missions
Rites
Some missions are referred to as rituals. There are many rites available on the Bark (The Majestic Garden, The Kincher, The Homin Crafting, etc.) that allow you to obtain various benefits, from improving your character's characteristics to improving his crafting skills. The status of your character's progress in performing the rites can be viewed in your encyclopedia (Shift+E then ENCYCLOPEDY). Note that your character can only start performing the rite itself if he has previously completed a few missions, which, if he fails to complete them, he can resume after a period of latency.
In 2023, the Encyclopedia was integrated into a larger window, and a v2 version introduce new rites.
the same, in reduced mode
A new rite, with a new interface
Apartments
Once you are a subscribed player, your avatar may purchase an apartment.
They run 1 million dappers in a capital city and 500 thousand dappers in a town.
The apartment will hold your materials and supplies up to a bulk of 2000.
When you enter your apartment a new tab will appear in your inventory: ROOM.
When you leave your apartment it will disappear.
Pesky Closet!
That can be a problem when you are away from your apartment and cannot remember what items are there.
To solve that try this "secret" trick.
Go to your apartment and open the INVENTORY window. Be sure the window is unlocked (does not have a padlock in the upper right corner).
Right-click the ROOM tab so it has it's own window on the desktop.
Lock that window and the INVENTORY window.
Now press <ctrl>+<shift>+F2 to freeze it in the F2 alternate desktop.
Return to the default desktop F1 before you leave.
That's it!
Now wherever you are, just press F2 to see your apartment inventory.
Occupations
The eight occupations are: Water-Carrier, Florist, Toolmaker, Scrollmaker, Larvester, Butcher, Medic, and Magnetic Cartographer.
The Toolmaker and Butcher trainers are located in Pyr.
The Florist and Scrollmaker are located in Yrkranis.
The Water-carrier and Larvester trainers are found in Fairhaven.
Finally, both the Medic and Magnetic Cartographer are situated in Zora.
The first missions are taken from the occupation instructor.
After they are completed (i.e. crafting or gathering) then you go to the nearby table or board to practice your occupation.
The choice of upgrading your items is presented.
This is a risky attempt to make, for example, a Water Quality Certificate q10 into a Water Quality Certificate q15.
Practicing your occupation completes the cycle.
All the occupations allow you to turn-in your work for credit that will raise you through the six levels to the final rank of master.
You can also take the item for personal use such as consuming or giving to the NH Transporters.
Make mucho Dappers
To convert your occupational goods, say water into dappers, take the items for personal use.
Teleport to your home capital and seek the New Horizon Transporter.
Talk to the Transporter and select "I want to help you."
You will then be presented with four choices, give some food, give some water, give a map, or give a tool.
These are the products from the four occupations of florist, water-carrier, mapmaker, and toolmaker respectively.
The transporter will take one item at a time, until s/he is full.
The transporter will then report that no more items are needed.
Macros
The MACROS window is found under Task-bar>System>Macros which, when clicked, shows the window.
At the top right is a button NEW MACRO.
Press this button to open a new window to get started.
First, select the Icon to create an unique icon for this macro.
Pick a background colour, a foreground colour, a pattern, and a 5-letter text name that will appear on the icon itself, then OK.
Next, select a descriptive name for the NewMacro.
Assign a key if you wish, then ADD COMMAND.
This is where the fun starts.
Commands are arranged in categories for use.
Select a Category then an Action to perform.
Keep doing this in the desired order of final execution, from top to bottom.
By right-clicking a command, it can be moved up or down, edited or deleted.
It will take some practice and testing to get macros to work the way you want.
Drag the finished macro icon to the action bar if you didn't assign a key to it. Here are some examples:
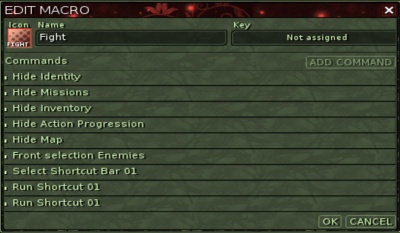
Fight
For an Action Bar #1 with the Kill action in the #1 cell:
|
|
- Hide Identity
- Hide Missions
- Hide Inventory
- Hide Action Progression
- Hide Map
- (this closes all your windows)
- Front selection Enemies
- Select Shortcut Bar 01
- Run Shortcut 01
- Run Shortcut 01
|
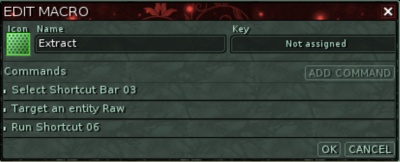
For an extraction action on Action Bar #3 in cell 6:
|
|
- Target an entity Raw
- Select Shortcut Bar 03
- Run Shortcut 06
Like the above but only for fiber:
- Target an entity Fiber
- Select Shortcut Bar 03
- Run Shortcut 06
|
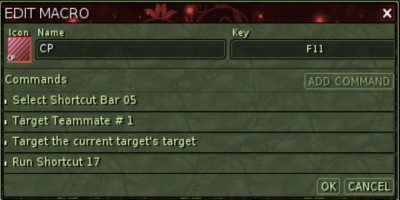
Care Plan
For a CP action on Bar #5 in cell Shift-7 while in a team:
|
|
- Select Shortcut Bar 05
- Target Teammate #1
- Target the current target's target
- Run Shortcut 17
|
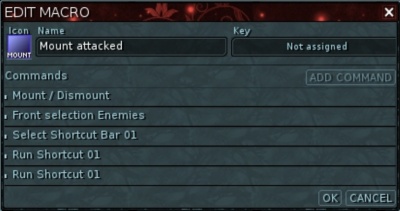
Mount Attacked
When gingos attack you and the mount you ride and you have weapon in hand:
|
|
- Mount / Dismount
- Front selection Enemies
- Select Shortcut Bar 01
- Run Shortcut 01 (default attack)
- Run Shortcut 01
|
Mob Levels
See Mob Levels
This seems to be a list of MOBs painstakingly translated from old scrolls, indicating the weakest at the top, progressing to most the powerful at the bottom.
There may be errors because the old scrolls were found damaged.
Kitin Observers have reported other ranks not listed on the these old documents.
Brotherhood of the Fortunate Gubani
If interested in gambling, an avatar may purchase tokens from the Gubani representative for use in the nearby wheel-of-fortune.
If played long enough, the avatar will gain interesting titles.
Free to Subscribe
Individuals may play Ryzom without charge indefinitely.
The avatars will be allowed to progress to level 125 in any skill, but not beyond.
Paid subscribers will be allowed to buy three additional mektoub packers, receive a permanent experience catalyzer (double xp for all actions), progress up to level 250 in all 63 skills, and gain other privileges.
Log on to the internet website http://www.ryzom.com/ then click 3. pay to have a full access from the right sidebar.
Login and follow the payment instructions.
Enjoy!
GNU Free Documentation License
Version 1.3, 3 November 2008
Copyright © 2000, 2001, 2002, 2007, 2008 Free Software Foundation, Inc. <http://fsf.org/>
Everyone is permitted to copy and distribute verbatim copies of this license document, but changing it is not allowed.
0. PREAMBLE
The purpose of this License is to make a manual, textbook, or other functional and useful document "free" in the sense of freedom: to assure everyone the effective freedom to copy and redistribute it, with or without modifying it, either commercially or noncommercially.
Secondarily, this License preserves for the author and publisher a way to get credit for their work, while not being considered responsible for modifications made by others.
This License is a kind of "copyleft", which means that derivative works of the document must themselves be free in the same sense.
It complements the GNU General Public License, which is a copyleft license designed for free software.
We have designed this License in order to use it for manuals for free software, because free software needs free documentation: a free program should come with manuals providing the same freedoms that the software does.
But this License is not limited to software manuals; it can be used for any textual work, regardless of subject matter or whether it is published as a printed book. We recommend this License principally for works whose purpose is instruction or reference.
1. APPLICABILITY AND DEFINITIONS
This License applies to any manual or other work, in any medium, that contains a notice placed by the copyright holder saying it can be distributed under the terms of this License.
Such a notice grants a world-wide, royalty-free license, unlimited in duration, to use that work under the conditions stated herein.
The "Document", below, refers to any such manual or work.
Any member of the public is a licensee, and is addressed as "you".
You accept the license if you copy, modify or distribute the work in a way requiring permission under copyright law.
A "Modified Version" of the Document means any work containing the Document or a portion of it, either copied verbatim, or with modifications and/or translated into another language.
A "Secondary Section" is a named appendix or a front-matter section of the Document that deals exclusively with the relationship of the publishers or authors of the Document to the Document's overall subject (or to related matters) and contains nothing that could fall directly within that overall subject.
(Thus, if the Document is in part a textbook of mathematics, a Secondary Section may not explain any mathematics.)
The relationship could be a matter of historical connection with the subject or with related matters, or of legal, commercial, philosophical, ethical or political position regarding them.
The "Invariant Sections" are certain Secondary Sections whose titles are designated, as being those of Invariant Sections, in the notice that says that the Document is released under this License.
If a section does not fit the above definition of Secondary then it is not allowed to be designated as Invariant.
The Document may contain zero Invariant Sections.
If the Document does not identify any Invariant Sections then there are none.
The "Cover Texts" are certain short passages of text that are listed, as Front-Cover Texts or Back-Cover Texts, in the notice that says that the Document is released under this License.
A Front-Cover Text may be at most 5 words, and a Back-Cover Text may be at most 25 words.
A "Transparent" copy of the Document means a machine-readable copy, represented in a format whose specification is available to the general public, that is suitable for revising the document straightforwardly with generic text editors or (for images composed of pixels) generic paint programs or (for drawings) some widely available drawing editor, and that is suitable for input to text formatters or for automatic translation to a variety of formats suitable for input to text formatters.
A copy made in an otherwise Transparent file format whose markup, or absence of markup, has been arranged to thwart or discourage subsequent modification by readers is not Transparent.
An image format is not Transparent if used for any substantial amount of text.
A copy that is not "Transparent" is called "Opaque".
Examples of suitable formats for Transparent copies include plain ASCII without markup, Texinfo input format, LaTeX input format, SGML or XML using a publicly available DTD, and standard-conforming simple HTML, PostScript or PDF designed for human modification.
Examples of transparent image formats include PNG, XCF and JPG.
Opaque formats include proprietary formats that can be read and edited only by proprietary word processors, SGML or XML for which the DTD
and/or processing tools are not generally available, and the machine-generated HTML, PostScript or PDF produced by some word processors for output purposes only.
The "Title Page" means, for a printed book, the title page itself, plus such following pages as are needed to hold, legibly, the material this License requires to appear in the title page.
For works in formats which do not have any title page as such, "Title Page" means the text near the most prominent appearance of the work's title, preceding the beginning of the body of the text.
The "publisher" means any person or entity that distributes copies of the Document to the public.
A section "Entitled XYZ" means a named subunit of the Document whose title either is precisely XYZ or contains XYZ in parentheses following text that translates XYZ in another language.
(Here XYZ stands for a specific section name mentioned below, such as "Acknowledgements", "Dedications", "Endorsements", or "History".) To "Preserve the Title" of such a section when you modify the Document means that it remains a section "Entitled XYZ" according to this definition.
The Document may include Warranty Disclaimers next to the notice which states that this License applies to the Document.
These Warranty Disclaimers are considered to be included by reference in this License, but only as regards disclaiming warranties: any other implication that these Warranty Disclaimers may have is void and has no effect on the meaning of this License.
2. VERBATIM COPYING
You may copy and distribute the Document in any medium, either commercially or noncommercially, provided that this License, the copyright notices, and the license notice saying this License applies to the Document are reproduced in all copies, and that you add no other conditions whatsoever to those of this License.
You may not use technical measures to obstruct or control the reading or further copying of the copies you make or distribute.
However, you may accept compensation in exchange for copies.
If you distribute a large enough number of copies you must also follow the conditions in section 3.
You may also lend copies, under the same conditions stated above, and you may publicly display copies.
3. COPYING IN QUANTITY
If you publish printed copies (or copies in media that commonly have printed covers) of the Document, numbering more than 100, and the Document's license notice requires Cover Texts, you must enclose the copies in covers that carry, clearly and legibly, all these Cover Texts: Front-Cover Texts on the front cover, and Back-Cover Texts on the back cover.
Both covers must also clearly and legibly identify you as the publisher of these copies.
The front cover must present the full title with all words of the title equally prominent and visible.
You may add other material on the covers in addition.
Copying with changes limited to the covers, as long as they preserve the title of the Document and satisfy these conditions, can be treated as verbatim copying in other respects.
If the required texts for either cover are too voluminous to fit legibly, you should put the first ones listed (as many as fit reasonably) on the actual cover, and continue the rest onto adjacent pages.
If you publish or distribute Opaque copies of the Document numbering more than 100, you must either include a machine-readable Transparent copy along with each Opaque copy, or state in or with each Opaque copy a computer-network location from which the general network-using public has access to download using public-standard network protocols a complete Transparent copy of the Document, free of added material.
If you use the latter option, you must take reasonably prudent steps, when you begin distribution of Opaque copies in quantity, to ensure that this Transparent copy will remain thus accessible at the stated location until at least one year after the last time you distribute an Opaque copy (directly or through your agents or retailers) of that edition to the public.
It is requested, but not required, that you contact the authors of the Document well before redistributing any large number of copies, to give them a chance to provide you with an updated version of the Document.
4. MODIFICATIONS
You may copy and distribute a Modified Version of the Document under the conditions of sections 2 and 3 above, provided that you release the Modified Version under precisely this License, with the Modified Version filling the role of the Document, thus licensing distribution and modification of the Modified Version to whoever possesses a copy of it.
In addition, you must do these things in the Modified Version:
- A. Use in the Title Page (and on the covers, if any) a title distinct from that of the Document, and from those of previous versions (which should, if there were any, be listed in the History section of the Document).
- You may use the same title as a previous version if the original publisher of that version gives permission.
- B. List on the Title Page, as authors, one or more persons or entities responsible for authorship of the modifications in the Modified Version, together with at least five of the principal authors of the Document (all of its principal authors, if it has fewer than five), unless they release you from this requirement.
- C. State on the Title page the name of the publisher of the Modified Version, as the publisher.
- D. Preserve all the copyright notices of the Document.
- E. Add an appropriate copyright notice for your modifications adjacent to the other copyright notices.
- F. Include, immediately after the copyright notices, a license notice giving the public permission to use the Modified Version under the terms of this License, in the form shown in the Addendum below.
- G. Preserve in that license notice the full lists of Invariant Sections and required Cover Texts given in the Document's license notice.
- H. Include an unaltered copy of this License.
- I. Preserve the section Entitled "History", Preserve its Title, and add to it an item stating at least the title, year, new authors, and publisher of the Modified Version as given on the Title Page.
- If there is no section Entitled "History" in the Document, create one stating the title, year, authors, and publisher of the Document as given on its Title Page, then add an item describing the Modified Version as stated in the previous sentence.
- J. Preserve the network location, if any, given in the Document for public access to a Transparent copy of the Document, and likewise the network locations given in the Document for previous versions it was based on.
- These may be placed in the "History" section.
- You may omit a network location for a work that was published at least four years before the Document itself, or if the original publisher of the version it refers to gives permission.
- K. For any section Entitled "Acknowledgements" or "Dedications", Preserve the Title of the section, and preserve in the section all the substance and tone of each of the contributor acknowledgements and/or dedications given therein.
- L. Preserve all the Invariant Sections of the Document, unaltered in their text and in their titles.
- Section numbers or the equivalent are not considered part of the section titles.
- M. Delete any section Entitled "Endorsements".
- Such a section may not be included in the Modified Version.
- N. Do not retitle any existing section to be Entitled "Endorsements" or to conflict in title with any Invariant Section.
- O. Preserve any Warranty Disclaimers.
If the Modified Version includes new front-matter sections or appendices that qualify as Secondary Sections and contain no material copied from the Document, you may at your option designate some or all of these sections as invariant.
To do this, add their titles to the list of Invariant Sections in the Modified Version's license notice.
These titles must be distinct from any other section titles.
You may add a section Entitled "Endorsements", provided it contains nothing but endorsements of your Modified Version by various parties—for example, statements of peer review or that the text has been approved by an organization as the authoritative definition of a standard.
You may add a passage of up to five words as a Front-Cover Text, and a passage of up to 25 words as a Back-Cover Text, to the end of the list of Cover Texts in the Modified Version.
Only one passage of Front-Cover Text and one of Back-Cover Text may be added by (or through arrangements made by) any one entity.
If the Document already includes a cover text for the same cover, previously added by you or by arrangement made by the same entity you are acting on behalf of, you may not add another; but you may replace the old one, on explicit permission from the previous publisher that added the old one.
The author(s) and publisher(s) of the Document do not by this License give permission to use their names for publicity for or to assert or imply endorsement of any Modified Version.
5. COMBINING DOCUMENTS
You may combine the Document with other documents released under this License, under the terms defined in section 4 above for modified versions, provided that you include in the combination all of the Invariant Sections of all of the original documents, unmodified, and list them all as Invariant Sections of your combined work in its license notice, and that you preserve all their Warranty Disclaimers.
The combined work need only contain one copy of this License, and multiple identical Invariant Sections may be replaced with a single copy.
If there are multiple Invariant Sections with the same name but different contents, make the title of each such section unique by adding at the end of it, in parentheses, the name of the original author or publisher of that section if known, or else a unique number.
Make the same adjustment to the section titles in the list of Invariant Sections in the license notice of the combined work.
In the combination, you must combine any sections Entitled "History" in the various original documents, forming one section Entitled "History"; likewise combine any sections Entitled "Acknowledgements", and any sections Entitled "Dedications". You must delete all sections Entitled "Endorsements".
6. COLLECTIONS OF DOCUMENTS
You may make a collection consisting of the Document and other documents released under this License, and replace the individual copies of this License in the various documents with a single copy that is included in the collection, provided that you follow the rules of this License for verbatim copying of each of the documents in all other respects.
You may extract a single document from such a collection, and distribute it individually under this License, provided you insert a copy of this License into the extracted document, and follow this License in all other respects regarding verbatim copying of that document.
7. AGGREGATION WITH INDEPENDENT WORKS
A compilation of the Document or its derivatives with other separate and independent documents or works, in or on a volume of a storage or distribution medium, is called an "aggregate" if the copyright resulting from the compilation is not used to limit the legal rights of the compilation's users beyond what the individual works permit.
When the Document is included in an aggregate, this License does not apply to the other works in the aggregate which are not themselves derivative works of the
Document.
If the Cover Text requirement of section 3 is applicable to these copies of the Document, then if the Document is less than one half of the entire aggregate, the Document's Cover Texts may be placed on covers that bracket the Document within the aggregate, or the electronic equivalent of covers if the Document is in electronic form. Otherwise they must appear on printed covers that bracket the whole aggregate.
8. TRANSLATION
Translation is considered a kind of modification, so you may distribute translations of the Document under the terms of section 4.
Replacing Invariant Sections with translations requires special permission from their copyright holders, but you may include translations of some or all Invariant Sections in addition to the original versions of these Invariant Sections.
You may include a translation of this License, and all the license notices in the Document, and any Warranty Disclaimers, provided that you also include the original English version of this License and the original versions of those notices and disclaimers.
In case of a disagreement between the translation and the original version of this License or a notice or disclaimer, the original version will prevail.
If a section in the Document is Entitled "Acknowledgements", "Dedications", or "History", the requirement (section 4) to Preserve its Title (section 1) will typically require changing the actual title.
9. TERMINATION
You may not copy, modify, sublicense, or distribute the Document except as expressly provided under this License.
Any attempt otherwise to copy, modify, sublicense, or distribute it is void, and will automatically terminate your rights under this License.
However, if you cease all violation of this License, then your license from a particular copyright holder is reinstated (a) provisionally, unless and until the copyright holder explicitly and finally terminates your license, and (b) permanently, if the copyright holder fails to notify you of the violation by some reasonable means prior to 60 days after the cessation.
Moreover, your license from a particular copyright holder is reinstated permanently if the copyright holder notifies you of the violation by some reasonable means, this is the first time you have received notice of violation of this License (for any work) from that copyright holder, and you cure the violation prior to 30 days after your receipt of the notice.
Termination of your rights under this section does not terminate the licenses of parties who have received copies or rights from you under this License.
If your rights have been terminated and not permanently reinstated, receipt of a copy of some or all of the same material does not give you any
rights to use it.
10. FUTURE REVISIONS OF THIS LICENSE
The Free Software Foundation may publish new, revised versions of the GNU Free Documentation License from time to time. Such new versions will be similar in spirit to the present version, but may differ in detail to address new problems or concerns.
See http://www.gnu.org/copyleft/.
Each version of the License is given a distinguishing version number.
If the Document specifies that a particular numbered version of this License "or any later version" applies to it, you have the option of following the terms and conditions either of that specified version or of any later version that has been
published (not as a draft) by the Free Software Foundation.
If the Document does not specify a version number of this License, you may choose any version ever published (not as a draft) by the Free Software Foundation.
If the Document specifies that a proxy can decide which future versions of this License can be used, that proxy's public statement of acceptance of a version permanently authorizes you to choose that version for the Document.
11. RELICENSING
"Massive Multiauthor Collaboration Site" (or "MMC Site") means any World Wide Web server that publishes copyrightable works and also provides prominent facilities for anybody to edit those works.
A public wiki that anybody can edit is an example of such a server.
A "Massive Multiauthor Collaboration" (or "MMC") contained in the site means any set of copyrightable works thus published on the MMC site.
"CC-BY-SA" means the Creative Commons Attribution-Share Alike 3.0 license published by Creative Commons Corporation, a not-for-profit corporation with a principal place of business in San Francisco, California, as well as future copyleft versions of that license published by that same organization.
"Incorporate" means to publish or republish a Document, in whole or in part, as part of another Document.
An MMC is "eligible for relicensing" if it is licensed under this License, and if all works that were first published under this License somewhere other than this MMC, and subsequently incorporated in whole or in part into the MMC, (1) had no cover texts or invariant sections, and (2) were thus incorporated prior to November 1, 2008.
The operator of an MMC Site may republish an MMC contained in the site under CC-BY-SA on the same site at any time before August 1, 2009, provided the MMC is eligible for relicensing.
Common Acronyms and Abbreviations
More on User Manual/Common Acronyms and Abbreviations
The Ryzom Glossary can be very handy.
Credits
- This page is made from the original document produced by anonymous volunteer contributors
- David M. Blaies, editor.
- and
- Edited for fact-checking and style by Cerulean Tryker and others.
- Copyright (C) 2013 by David M. Blaies.
- Permission is granted to copy, distribute and/or modify this document under the terms of the GNU Free Documentation
- License, Version 1.3 or any later version published by the Free Software Foundation; with no Invariant Sections, no
- Front-Cover Texts, and no Back-Cover Texts. A copy of the license is included in the section entitled "GNU Free
- Documentation License".
- “Ryzom” is a copyrighted name of Winch Gate Property Limited, Potamos, Cyprus, successor to the Nevrax Corporation
- Images are courtesy of The Ryzom Services
