Материал из ЭнциклопАтис
Ryzom User's Manual rev.3


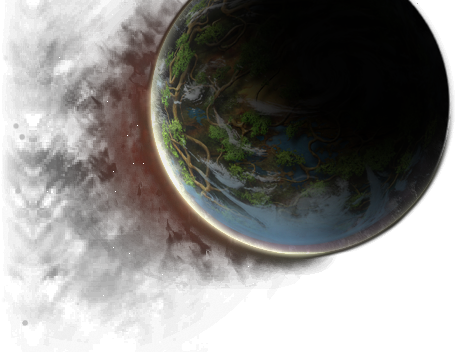
Ryzom is a very well established Massively Multiplayer Online Role Playing Game (MMORPG). It runs internationally from a central internet server in France and enjoys quite active membership nd support. The game itself is a type called a sandbox; you can do whatever you want in the sandbox within limits of the boundaries! Unlike other MMORPG, there is no directed plot that you must follow, no prescribed activities that you must do in a certain order. Any avatar can accomplish any skill and go anywhere you choose. When you open Ryzom, you open a window of adventure. When you play ryzom, you play with freedom. When you learn Ryzom, you learn interpersonal skills to keep forever. There is no final victory to finish the game. Ryzom never ends.
The Ryzom Glossary can be very handy.
Contents
- 1 Download and Install the game
- 2 Create an Account
- 3 Avatar Creation
- 4 Controls on the User Interface
- 5 Actions and Upgrades
- 6 Pop-ups
- 7 Missions
- 8 Merchants
- 9 Mektoubs
- 10 Death and penalty
- 11 Teleportation
- 12 Foraging
- 13 Crafting
- 14 Fighting
- 15 Guilds
- 16 Outposts
- 17 Quests
- 18 Rites
- 19 Apartments
- 20 Occupations
- 21 Macros
- 22 Mob Levels
- 23 Brotherhood of the Fortunate Gubani
- 24 Free to Subscribe
- 25 GNU Free Documentation License
- 26 Common Acronyms and Abbreviations
- 27 Credits
Download and Install the game
(How you do this will depend on your operating system; follow the instructions at http://ryzom.com .)
New content and roadmap
- We now have access to the current Roadmap ans you'll find explanations about it.
- Read on the forum the OFFICIAL NEWS, it announce all the new features
- https://bitbucket.org/ryzom/
In short :
- From October 2016, all clients migrates from 2.x (and oldiers) to 3.0, with a new installer/patch system. More on http://forge.ryzom.com/wiki/Ryzom_Installer_Manual
- in 2017 patches added many new stuffs (new chat, better inventory, new Loot Locking System, scenographic editor...) , find here what's new, with links to forum.
- New 2018: we can go back to Silan (Patch 3.2.1), ranger rite on the forum and PoWo Creator is coming...
- New 2019: Clients Improvements (as UI-Scale for ex), new bosses, Guild Islands, New rewards at Wheel of Fortune :p
Section added by Craftjenn, Ranger du Cercle du Bois d'Almati (talk) March 2018 (CEST).
Updated on CraftJenn, Ranger du Cercle du Bois d'Almati (talk) April 2019
Create an Account
Playing Ryzom requires an active game account. On the main login screen, click CREATE ACCOUNT. Follow the instructions to create an account and password on the main international server. Both must consist of 5-12 lower-case characters and numbers. No symbols may be used. The username you create here will be your public name in the official account. The name of your avatar will be chosen later. Select the Submit button when you are finished.
Avatar Creation
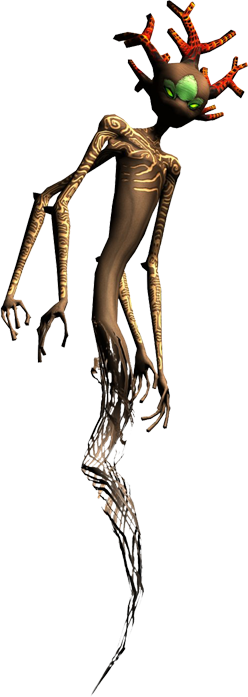
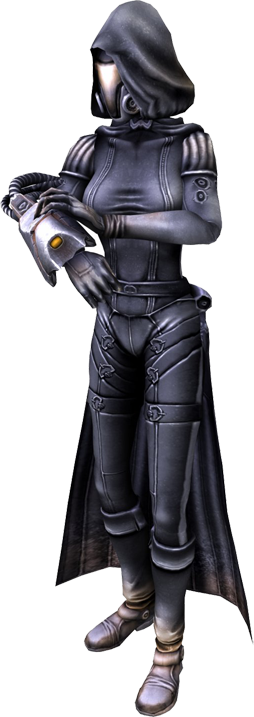
Before you can play Ryzom, you need to create an avatar to represent you on Atys. After logging in to the main server, you will have five slots open to create new avatars, shown on the left side of the screen as large question marks. To begin creation of a new avatar, choose one of the open avatar slots and click the Create New button in the lower-right corner of the screen.
Civilization
Your civilization will determine your base appearance, the initial reputation you have with various game factions, and the initial race crafting skills you will use. Your civilization choice will not limit the areas in which you can travel, or what skills you can eventually learn.
Gender
Your gender will change your physical appearance, but will otherwise have no affect on the gameplay. Once you've selected your avatar's gender, proceed to the next step in the column on the left.
Physical Appearance
Using the sliders, customize the shape of your avatar's body. You can rotate your avatar by clicking and dragging with the left mouse button and you can zoom in/out by clicking and dragging with the right mouse button. Your physical appearance will not affect your avatar statistics. Once you've decided on your avatar's appearance, proceed to the next step.
Facial Customization
Using the sliders, customize your avatar's face. Different civilizations and genders will have different options for customization here. You can rotate your avatar's head by clicking and dragging with the left mouse button, and you can zoom in/out by clicking and dragging with the right mouse button. Once you've finished customizing your avatar's face, proceed to the final step in the left column.
Action Packs
Your choice here will determine your avatar's initial set of equipment and Actions. No matter what you choose, your avatar will start at level one in all skill trees and will be able to advance equally in any skill that you choose. Using the sliders, customize your avatar's initial Action pack.
Fame and Alignment
The race of your avatar has an effect on the Fame you have with other races and with the two powers, the Kami and the Karavan. Each race has another race that is it's favorite and a race that they dislike. Each race is initially regarded more favorably by one of the powers; the Trykers and Matis are favored by the Karavan and the Zorai and Fyros are favored by the Kami. These initial fame scores range from +20 to -20 on a scale of +/- 100. These initial scores do not force you to an alignment with any nation or Power; you can go with the flow or fight against it. You cannot achieve alignment with a power or a nation until after you get to the mainland and earn more fame and undertake rites. It is recommended that you think carefully on this matter. It is not irreversible, but it is difficult to reverse.
Once you are aligned, this will affect which guilds you can join, which teleport altars you can use and which players can earn PvP points by fighting against you.
It will also affect which side people expect you to fight on in Outpost battles.
Review
Animate your finished avatar with the arrow button in the lower mid-left of the screen. Review your race, gender, civilization, and initial actions; then select the Finish button at the bottom right of the screen. If displayed, select OK to choose the Atys world community. Next, choose your key configuration; most modern computer users will prefer the arrow keys to move (together with mouse or trackball).
Name Your Avatar
The final step for your avatar is to select a name. Each name on Atys must be unique, so it may take several attempts to choose a name. Names must adhere to the Ryzom code of conduct. Once your name is accepted, you will see your new avatar in a slot on the left. Select PLAY to start gameplay on the island of Silan. Click on Chiang the Strong for your first orientation mission.


Inventory
When clicking the second icon on the Task bar WINDOWS tab, an inventory window will appear. The basic window has two tabs, BAG and EQUIP. Bag is everything that you carry, while EQUIP is the jewellery and armour that you are wearing. If you buy a mektoub mount and packer, they will appear in their own tabs as MOUNT1 and PACK2. Also, if you have joined a guild that has an outpost, and you are near that outpost, a new tab will appear in the inventory. That will be GUILD and contain all the contents of the guild hall. You will also see the Guild tab when you are in the guildhall. In the same way, that will be ROOM with all the contents of your apartment, seen when in it (see below).

If you do not wish to lose your items accidentally, by destroying or trading them, select the right-click Lock/Unlock functions. It is recommended that you keep your most precious items, armour, and weapons locked.

New: text search in inventory, and group to move and ware armor easily (fast resume of 2 patches, links to forum).


Actions and Upgrades
Actions can be purchased from any of the trainers. When learning an action, the complete set of root, options, and credits will be obtained in an icon. That icon can replace the previous version of a lower action. However, if an upgrade is purchased, particularly from a magic trainers, then only the option or only the credit will be purchased. Each will drop an icon on the Task-bar that can be deleted. One must then edit by selecting an action icon and right-clicking the Edit Action choice to open an edit window. There the individual option or credit “brick” can be updated to the newly learned upgrade by clicking on it. The icon name must also be manually changed to the updated version. This will avoid confusion, because the trainer may still retain the complete action for that upgrade including credits that you might not have. However, the price in skill points will change to reflect the value of only the "bricks" or "stanzas" that you do not yet own. It is not possible to "waste" skill points; once you have all "bricks" for a certain action, it will be removed from the trainer.


Warning Icons
Small warning icons will appear on the screen to alert you of any spell, catalyzer, or death penalty that affects you. A larger skull & crossbones image will appear if an owned mektoub dies. It will inform you how much time remains to collect your possessions from the mektoub before it decomposes. Hovering the mouse over the icon will give more information about the function and status of that icon.

Outpost Battle Window
When entering the area of a disputed outpost, a window will briefly open to alert the player to this situation. The player will either pick ATTACK, DEFEND, or NEUTRAL. If neither is selected, the avatar will not be tagged, and remains neutral. Neutral observers cannot be attacked and cannot heal during battle. They must stay as neutral observers and may be asked to move if they affect things.
Missions
On Silan (the tutorial map when you just create a toon), take the first mission with Chiang (in the camp, on the hill), then with trainers.
Throughout Ryzom are small missions to accomplish.
The mission givers are welcomers in each city, suppliers, captains, sergeants, corporals, ambassadors and many others. These missions pay sometimes in fame points, or race points, or dappers. Most may be taken multiple times, after a cooling-off period.

Mektoubs
Free players may purchase one mektoub Mount. Subscribed players may purchase three packers and a mount, for a total of four mektoubs. At advanced levels, packers are very useful to the forager and crafter. Mektoubs must be fed, so if you are traveling a long ways, be sure to buy food from the stable boy and move the food onto each animal. Otherwise, take the mektoub to the nearest stable and give the Enter Stable command from the animal window. A feeding plan can be purchased from the stable boy (cheaper than forage bales). An animal kept in the stable will last indefinitely. Mounts can go to other lands with you. They must go into the gate after you, (by issuing the “follow me” command). Beware though; they can be killed. A mount can be killed by MOBs – even as low level as growling gingos – if you are sitting on it. If a mektoub dies, you will see a skull icon on the screen advising you of the time remaining to unload the carried items before the mektoub disappears. You can neither magically heal nor resurrect a mektoub.
Death and penalty
A killed character can be resurrected by another through the casting (repeated if necessary) of healing spells by the latter (if available). If death occurred during a solo adventure, you can request this resurrection (or rez) either by sending a /tell to one of your friends, or by broadcasting a distress message on the REGION channel, message where you will specify your position and the time remaining before your character undergoes a forced resurrection. It is recommended that you only send such a call for help in the UNI channel if no one is in the region (see /who command described above).
If, finally, no savior is available or close enough to your character to raise him in time, you can still either choose the location of your forced resurrection on the map displayed at the time of your fall, or activate (also known as tearing) a teleportation pact to the altar of your choice. In both cases, your character will end up at the chosen place, alive, but with a death penalty (or DP). This penalty prohibits you from accumulating experience points (XPs) usually earned through your actions: these points are then used to exhaust the penalty. At lower levels, exhausting the penalty is fairly easy, but at higher levels many players exhaust it during a drilling sequence, an activity that produces a correct XP without running too great a risk of additional PD. In addition, altars sell a service that significantly increases the speed of PD exhaustion: Ma-Duk's Breath or Jena's Kiss.
Teleportation
Fast Traveling
On Silan, Chiang the Strong may arrange for you to teleport to the north end of the island. Unfortunately, you must run back to the ranger camp, as there is no TP back. On the mainland there are many places to go, but you will find it difficult to survive to get to them in the beginning. It can helpful to trek with several masters to each city and some intermediate teleport altars. There you can buy teleport pacts for your avatar so that fast travel to distant lands is possible in the future. You will not be able to buy all teleport pacts to start with. Some have requirements of alignment and even for very high fame with either Kami or Karavan.
Dying and death penalty
When you die, you can be resurrected (rezzed) by another player casting heal spells on you. Ask for help with a /tell to friends or by a message in the REGION channel (specify where you are and how much time you have left). If there is no one in the region (use /who) then it is acceptable to ask in UNIVERSE channel.
Otherwise, you can chose your respawn location on the map that pops up or you can use a teleport pact in your inventory to select an altar.
At this point you will have a death penalty. This keeps you from accumulating xp for your actions. Instead the xp goes to work off your dp. At lower levels dp is very easy to work off. At higher levels most players work it off by harvesting, which gives decent xp with a low danger of getting yet more dp. Altars offer purchases of the Breath of Ma-Duk or Kiss of Jena which increase the decay of dp over time.
If you have to leave the computer, but you don't want to be attacked, go to a safe spot such as near a wall or in the water. Then type /afk in the message line. You will go into suspended animation and sparks will surround you until you return. If you wish to leave more details, just type /afk Dummy has to go to the bathroom. Anyone who does a "/tell Dummy Hi" will receive the message.
Foraging
Foraging is generally practiced in light armor, however, some strip their armor and forage nude or in minimal medium armor. You want to balance explosion protection with focus drain due to malus.
The default extraction action in forage should be the first leftmost icon in the action bar.
If you have multiple forage/extraction actions, the double-click will activate only the leftmost icon. You probably want to set your default defensive move to Dodge while foraging.
Many players organize their action bars by activity, such as all fight icons on #1, all magic on #2, all craft on #3, all forage on #4, etc.
This arrangement can be changed at any time via cut and paste operations on the icons. Foraging is best done with a partner. Occasionally you are killed while harvesting, so a partner can rez you. Later on, one person can extract whilst the other does actions to increase stability and source life (care-planning). Then the node will give more materials and it will prevent unfortunate dying.
When you find a mat, or sometimes several in one close area, it is a good idea to use the map to mark that location.
Later, you can right-click the little flag and set that in your compass. Then your compass will guide you straight to the mats. A pick must be equipped to prospect and forage. Since each deposit has a maximum level (shown in the SYS. INFO tab) the pick is required to be of the same level. Greslin picks reduce chance of explosion/gas and egiros has a chance of doubling an extraction yield while colored ones are the faction picks with a focus/hp boost and; all have the same durability. Picks break frequently (approximately every 5500 mats) don't get caught without a spare! Picks may be found at the tool merchant, the official race merchant, or obtained from other high-level player/avatars.
Materials are available in the qualities of basic, fine, choice, excellent, and supreme.
Digging better materials of the best q you can will result in the gain of more forage experience points per material harvested.
Crafting
Craft in as little light armour as possible. When you reach a new x10 level (i.e. 20, 30, 40, 50, etc.) you will be able to buy up the next level in that craft line. The first thing you should do is edit that action to include the HP, Stam, Sap, or Focus boost attributes that you have gained, so they will be included in all your products.
Bulk can be the problem (the line indicator on your bag inventory), especially for weapons and armour.
Sell, destroy or exchange your low q items before crafting. It is suggested that you sell your crafted items to the merchant or to other players to accumulate dappers. Money is always good, no matter how little it seems. Crafting in the game of Ryzom can be quite complicated. For example, an inherently slower weapon (e.g. a weapon that has a relatively low maximum possible speed value), if made well and with the right materials, can be faster than an inherently faster weapon made with mediocre materials. Each weapon has a maximum and minimum possible speed, damage, durability, dodge, parry, etc. From these values and a little guess work, one can estimate what an item's attribute will be post-craft knowing the pre-craft values shown in the crafting window.
The crafted item cannot be a higher quality (q) than your lowest q component.
Sometimes using superior components can lower the stats of the final product. Also, you will get a lower level product if you have a failure due to low success rate. To vary the component materials in a craft recipe, add a material to the plan, then click on it again. A SELECT QUANTITY window will pop-up so you can change the number of pieces of that material so you can add another. The final recipes can be saved by shift+w>Ryzom>Craft:Recipe-Book>New recipe or by writing it into your notebook.

After a product is produced, add your logo. This is accomplished by creating a plain text file with your logo. Then right-click your crafted item and select WRITE. Copy and paste (<ctrl> v) into the box. Now, your logo will not look correct, so modify your text file with spaces or delete spaces until it looks right — in the items info window — not just that write box. (This should be done only for exceptional results – it's your fame on the line.)
There are certain tools needed for crafting. They must be sized according to the level of products made.
When they either wear out or break, a new one must be purchased from the Tool Merchant. Nothing can be repaired on Atys. Remember, everything is full strength or capability until it's hit points reach a value of one.
Racial Plans
When you start your avatar on Silan, it has plans of its own race. The materials there will craft any item for any avatar. On the mainland, however, your race plan needs the local materials if they are higher than fine or basic. For example to make a matis medium quality sword from choice or higher materials, forest materials must be used. The only exceptions are materials foraged from the prime roots that can be used for any race craft.
Armour is crafted as LA, MA, or HA.
It is usually provided to another player as a full set of armor that are color, quality, and level matched. Therefore, the crafter should obtain all the plans for a suit of armor. For weapons, pick a single weapon such as 2h sword, 2h axe, or 2h pike and get very good at that one thing. Specialize! High q items with good stats will be most desirable and sell the best.
Jewellery is crafted in sets of 6 pieces and combine protections against the 7 types of elemental damage, along with resistances to a spell against you.
Since jewellery has no malus, every player wears full sets of jewelry, magically boosted with the desired trait, for example, foragers need focus-boosted jewels. The art of jewellery is to craft combinations that sum their effects to the benefit of the avatar.
As the crafter progresses in skill, they can purchase medium quality, high quality, and finally specialized designs such as the fiery Fryos swords as first seen on Silan.
The use of these plans affects only one characteristic of the item – the durability! The plans with the animated racial effects have the same durability and take the same amount of mats to make as a comparable high quality item.
Generic Plans
Generic plans may be obtained from certain missions. These plans produce a plain weapon with an interesting characteristic. Normal items are made from race plans and race materials only, but gray generic plans can utilize any materials from any area of any race, as can the outpost plans and special plans.


Occupations
The eight occupations are: Water-Carrier, Florist, Toolmaker, Scrollmaker, Larvester, Butcher, Medic, and Magnetic Cartographer. The Toolmaker and Butcher trainers are located in Pyr. The Florist and Scrollmaker are located in Yrkranis. The Water-carrier and Larvester trainers are found in Fairhaven. Finally, both the Medic and Magnetic Cartographer are situated in Zora.
The first missions are taken from the occupation instructor.
After they are completed (i.e. crafting or gathering) then you go to the nearby table or board to practice your occupation. The choice of upgrading your items is presented. This is a risky attempt to make, for example, a Water Quality Certificate q10 into a Water Quality Certificate q15. Practicing your occupation completes the cycle.
All the occupations allow you to turn-in your work for credit that will raise you through the six levels to the final rank of master.
You can also take the item for personal use such as consuming or giving to the NH Transporters.
Make mucho Dappers
To convert your occupational goods, say water into dappers, take the items for personal use.
Teleport to your home capital and seek the New Horizon Transporter. Talk to the Transporter and select "I want to help you." You will then be presented with four choices, give some food, give some water, give a map, or give a tool. These are the products from the four occupations of florist, water-carrier, mapmaker, and toolmaker respectively. The transporter will take one item at a time, until s/he is full. The transporter will then report that no more items are needed.
Macros
The MACROS window is found under Task-bar>System>Macros which, when clicked, shows the window. At the top right is a button NEW MACRO. Press this button to open a new window to get started. First, select the Icon to create an unique icon for this macro. Pick a background colour, a foreground colour, a pattern, and a 5-letter text name that will appear on the icon itself, then OK. Next, select a descriptive name for the NewMacro. Assign a key if you wish, then ADD COMMAND. This is where the fun starts. Commands are arranged in categories for use. Select a Category then an Action to perform. Keep doing this in the desired order of final execution, from top to bottom. By right-clicking a command, it can be moved up or down, edited or deleted. It will take some practice and testing to get macros to work the way you want. Drag the finished macro icon to the action bar if you didn't assign a key to it. Here are some examples:


Mob Levels
See Mob Levels This seems to be a list of MOBs painstakingly translated from old scrolls, indicating the weakest at the top, progressing to most the powerful at the bottom. There may be errors because the old scrolls were found damaged. Kitin Observers have reported other ranks not listed on the these old documents.
Brotherhood of the Fortunate Gubani
If interested in gambling, an avatar may purchase tokens from the Gubani representative for use in the nearby wheel-of-fortune. If played long enough, the avatar will gain interesting titles.
Free to Subscribe

GNU Free Documentation License
Version 1.3, 3 November 2008
Copyright © 2000, 2001, 2002, 2007, 2008 Free Software Foundation, Inc. <http://fsf.org/>
Everyone is permitted to copy and distribute verbatim copies of this license document, but changing it is not allowed.
0. PREAMBLE
The purpose of this License is to make a manual, textbook, or other functional and useful document "free" in the sense of freedom: to assure everyone the effective freedom to copy and redistribute it, with or without modifying it, either commercially or noncommercially.
Secondarily, this License preserves for the author and publisher a way to get credit for their work, while not being considered responsible for modifications made by others.
This License is a kind of "copyleft", which means that derivative works of the document must themselves be free in the same sense.
It complements the GNU General Public License, which is a copyleft license designed for free software.
We have designed this License in order to use it for manuals for free software, because free software needs free documentation: a free program should come with manuals providing the same freedoms that the software does.
But this License is not limited to software manuals; it can be used for any textual work, regardless of subject matter or whether it is published as a printed book. We recommend this License principally for works whose purpose is instruction or reference.
1. APPLICABILITY AND DEFINITIONS
This License applies to any manual or other work, in any medium, that contains a notice placed by the copyright holder saying it can be distributed under the terms of this License.
Such a notice grants a world-wide, royalty-free license, unlimited in duration, to use that work under the conditions stated herein. The "Document", below, refers to any such manual or work. Any member of the public is a licensee, and is addressed as "you". You accept the license if you copy, modify or distribute the work in a way requiring permission under copyright law.
A "Modified Version" of the Document means any work containing the Document or a portion of it, either copied verbatim, or with modifications and/or translated into another language.
A "Secondary Section" is a named appendix or a front-matter section of the Document that deals exclusively with the relationship of the publishers or authors of the Document to the Document's overall subject (or to related matters) and contains nothing that could fall directly within that overall subject.
(Thus, if the Document is in part a textbook of mathematics, a Secondary Section may not explain any mathematics.) The relationship could be a matter of historical connection with the subject or with related matters, or of legal, commercial, philosophical, ethical or political position regarding them.
The "Invariant Sections" are certain Secondary Sections whose titles are designated, as being those of Invariant Sections, in the notice that says that the Document is released under this License.
If a section does not fit the above definition of Secondary then it is not allowed to be designated as Invariant. The Document may contain zero Invariant Sections. If the Document does not identify any Invariant Sections then there are none. The "Cover Texts" are certain short passages of text that are listed, as Front-Cover Texts or Back-Cover Texts, in the notice that says that the Document is released under this License.
A Front-Cover Text may be at most 5 words, and a Back-Cover Text may be at most 25 words.
A "Transparent" copy of the Document means a machine-readable copy, represented in a format whose specification is available to the general public, that is suitable for revising the document straightforwardly with generic text editors or (for images composed of pixels) generic paint programs or (for drawings) some widely available drawing editor, and that is suitable for input to text formatters or for automatic translation to a variety of formats suitable for input to text formatters.
A copy made in an otherwise Transparent file format whose markup, or absence of markup, has been arranged to thwart or discourage subsequent modification by readers is not Transparent. An image format is not Transparent if used for any substantial amount of text. A copy that is not "Transparent" is called "Opaque".
Examples of suitable formats for Transparent copies include plain ASCII without markup, Texinfo input format, LaTeX input format, SGML or XML using a publicly available DTD, and standard-conforming simple HTML, PostScript or PDF designed for human modification.
Examples of transparent image formats include PNG, XCF and JPG. Opaque formats include proprietary formats that can be read and edited only by proprietary word processors, SGML or XML for which the DTD and/or processing tools are not generally available, and the machine-generated HTML, PostScript or PDF produced by some word processors for output purposes only.
The "Title Page" means, for a printed book, the title page itself, plus such following pages as are needed to hold, legibly, the material this License requires to appear in the title page.
For works in formats which do not have any title page as such, "Title Page" means the text near the most prominent appearance of the work's title, preceding the beginning of the body of the text.
The "publisher" means any person or entity that distributes copies of the Document to the public.
A section "Entitled XYZ" means a named subunit of the Document whose title either is precisely XYZ or contains XYZ in parentheses following text that translates XYZ in another language.
(Here XYZ stands for a specific section name mentioned below, such as "Acknowledgements", "Dedications", "Endorsements", or "History".) To "Preserve the Title" of such a section when you modify the Document means that it remains a section "Entitled XYZ" according to this definition.
The Document may include Warranty Disclaimers next to the notice which states that this License applies to the Document.
These Warranty Disclaimers are considered to be included by reference in this License, but only as regards disclaiming warranties: any other implication that these Warranty Disclaimers may have is void and has no effect on the meaning of this License.
2. VERBATIM COPYING
You may copy and distribute the Document in any medium, either commercially or noncommercially, provided that this License, the copyright notices, and the license notice saying this License applies to the Document are reproduced in all copies, and that you add no other conditions whatsoever to those of this License.
You may not use technical measures to obstruct or control the reading or further copying of the copies you make or distribute. However, you may accept compensation in exchange for copies. If you distribute a large enough number of copies you must also follow the conditions in section 3.
You may also lend copies, under the same conditions stated above, and you may publicly display copies.
3. COPYING IN QUANTITY
If you publish printed copies (or copies in media that commonly have printed covers) of the Document, numbering more than 100, and the Document's license notice requires Cover Texts, you must enclose the copies in covers that carry, clearly and legibly, all these Cover Texts: Front-Cover Texts on the front cover, and Back-Cover Texts on the back cover.
Both covers must also clearly and legibly identify you as the publisher of these copies. The front cover must present the full title with all words of the title equally prominent and visible. You may add other material on the covers in addition. Copying with changes limited to the covers, as long as they preserve the title of the Document and satisfy these conditions, can be treated as verbatim copying in other respects.
If the required texts for either cover are too voluminous to fit legibly, you should put the first ones listed (as many as fit reasonably) on the actual cover, and continue the rest onto adjacent pages.
If you publish or distribute Opaque copies of the Document numbering more than 100, you must either include a machine-readable Transparent copy along with each Opaque copy, or state in or with each Opaque copy a computer-network location from which the general network-using public has access to download using public-standard network protocols a complete Transparent copy of the Document, free of added material.
If you use the latter option, you must take reasonably prudent steps, when you begin distribution of Opaque copies in quantity, to ensure that this Transparent copy will remain thus accessible at the stated location until at least one year after the last time you distribute an Opaque copy (directly or through your agents or retailers) of that edition to the public.
It is requested, but not required, that you contact the authors of the Document well before redistributing any large number of copies, to give them a chance to provide you with an updated version of the Document.
4. MODIFICATIONS
You may copy and distribute a Modified Version of the Document under the conditions of sections 2 and 3 above, provided that you release the Modified Version under precisely this License, with the Modified Version filling the role of the Document, thus licensing distribution and modification of the Modified Version to whoever possesses a copy of it.
In addition, you must do these things in the Modified Version:
- A. Use in the Title Page (and on the covers, if any) a title distinct from that of the Document, and from those of previous versions (which should, if there were any, be listed in the History section of the Document).
- You may use the same title as a previous version if the original publisher of that version gives permission.
- B. List on the Title Page, as authors, one or more persons or entities responsible for authorship of the modifications in the Modified Version, together with at least five of the principal authors of the Document (all of its principal authors, if it has fewer than five), unless they release you from this requirement.
- C. State on the Title page the name of the publisher of the Modified Version, as the publisher.
- D. Preserve all the copyright notices of the Document.
- E. Add an appropriate copyright notice for your modifications adjacent to the other copyright notices.
- F. Include, immediately after the copyright notices, a license notice giving the public permission to use the Modified Version under the terms of this License, in the form shown in the Addendum below.
- G. Preserve in that license notice the full lists of Invariant Sections and required Cover Texts given in the Document's license notice.
- H. Include an unaltered copy of this License.
- I. Preserve the section Entitled "History", Preserve its Title, and add to it an item stating at least the title, year, new authors, and publisher of the Modified Version as given on the Title Page.
- If there is no section Entitled "History" in the Document, create one stating the title, year, authors, and publisher of the Document as given on its Title Page, then add an item describing the Modified Version as stated in the previous sentence.
- J. Preserve the network location, if any, given in the Document for public access to a Transparent copy of the Document, and likewise the network locations given in the Document for previous versions it was based on.
- These may be placed in the "History" section.
- You may omit a network location for a work that was published at least four years before the Document itself, or if the original publisher of the version it refers to gives permission.
- K. For any section Entitled "Acknowledgements" or "Dedications", Preserve the Title of the section, and preserve in the section all the substance and tone of each of the contributor acknowledgements and/or dedications given therein.
- L. Preserve all the Invariant Sections of the Document, unaltered in their text and in their titles.
- Section numbers or the equivalent are not considered part of the section titles.
- M. Delete any section Entitled "Endorsements".
- Such a section may not be included in the Modified Version.
- N. Do not retitle any existing section to be Entitled "Endorsements" or to conflict in title with any Invariant Section.
- O. Preserve any Warranty Disclaimers.
If the Modified Version includes new front-matter sections or appendices that qualify as Secondary Sections and contain no material copied from the Document, you may at your option designate some or all of these sections as invariant. To do this, add their titles to the list of Invariant Sections in the Modified Version's license notice. These titles must be distinct from any other section titles.
You may add a section Entitled "Endorsements", provided it contains nothing but endorsements of your Modified Version by various parties—for example, statements of peer review or that the text has been approved by an organization as the authoritative definition of a standard.
You may add a passage of up to five words as a Front-Cover Text, and a passage of up to 25 words as a Back-Cover Text, to the end of the list of Cover Texts in the Modified Version.
Only one passage of Front-Cover Text and one of Back-Cover Text may be added by (or through arrangements made by) any one entity. If the Document already includes a cover text for the same cover, previously added by you or by arrangement made by the same entity you are acting on behalf of, you may not add another; but you may replace the old one, on explicit permission from the previous publisher that added the old one.
The author(s) and publisher(s) of the Document do not by this License give permission to use their names for publicity for or to assert or imply endorsement of any Modified Version.
5. COMBINING DOCUMENTS
You may combine the Document with other documents released under this License, under the terms defined in section 4 above for modified versions, provided that you include in the combination all of the Invariant Sections of all of the original documents, unmodified, and list them all as Invariant Sections of your combined work in its license notice, and that you preserve all their Warranty Disclaimers.
The combined work need only contain one copy of this License, and multiple identical Invariant Sections may be replaced with a single copy.
If there are multiple Invariant Sections with the same name but different contents, make the title of each such section unique by adding at the end of it, in parentheses, the name of the original author or publisher of that section if known, or else a unique number. Make the same adjustment to the section titles in the list of Invariant Sections in the license notice of the combined work.
In the combination, you must combine any sections Entitled "History" in the various original documents, forming one section Entitled "History"; likewise combine any sections Entitled "Acknowledgements", and any sections Entitled "Dedications". You must delete all sections Entitled "Endorsements".
6. COLLECTIONS OF DOCUMENTS
You may make a collection consisting of the Document and other documents released under this License, and replace the individual copies of this License in the various documents with a single copy that is included in the collection, provided that you follow the rules of this License for verbatim copying of each of the documents in all other respects.
You may extract a single document from such a collection, and distribute it individually under this License, provided you insert a copy of this License into the extracted document, and follow this License in all other respects regarding verbatim copying of that document.
7. AGGREGATION WITH INDEPENDENT WORKS
A compilation of the Document or its derivatives with other separate and independent documents or works, in or on a volume of a storage or distribution medium, is called an "aggregate" if the copyright resulting from the compilation is not used to limit the legal rights of the compilation's users beyond what the individual works permit.
When the Document is included in an aggregate, this License does not apply to the other works in the aggregate which are not themselves derivative works of the Document.
If the Cover Text requirement of section 3 is applicable to these copies of the Document, then if the Document is less than one half of the entire aggregate, the Document's Cover Texts may be placed on covers that bracket the Document within the aggregate, or the electronic equivalent of covers if the Document is in electronic form. Otherwise they must appear on printed covers that bracket the whole aggregate.
8. TRANSLATION
Translation is considered a kind of modification, so you may distribute translations of the Document under the terms of section 4.
Replacing Invariant Sections with translations requires special permission from their copyright holders, but you may include translations of some or all Invariant Sections in addition to the original versions of these Invariant Sections. You may include a translation of this License, and all the license notices in the Document, and any Warranty Disclaimers, provided that you also include the original English version of this License and the original versions of those notices and disclaimers. In case of a disagreement between the translation and the original version of this License or a notice or disclaimer, the original version will prevail. If a section in the Document is Entitled "Acknowledgements", "Dedications", or "History", the requirement (section 4) to Preserve its Title (section 1) will typically require changing the actual title.
9. TERMINATION
You may not copy, modify, sublicense, or distribute the Document except as expressly provided under this License.
Any attempt otherwise to copy, modify, sublicense, or distribute it is void, and will automatically terminate your rights under this License.
However, if you cease all violation of this License, then your license from a particular copyright holder is reinstated (a) provisionally, unless and until the copyright holder explicitly and finally terminates your license, and (b) permanently, if the copyright holder fails to notify you of the violation by some reasonable means prior to 60 days after the cessation.
Moreover, your license from a particular copyright holder is reinstated permanently if the copyright holder notifies you of the violation by some reasonable means, this is the first time you have received notice of violation of this License (for any work) from that copyright holder, and you cure the violation prior to 30 days after your receipt of the notice.
Termination of your rights under this section does not terminate the licenses of parties who have received copies or rights from you under this License.
If your rights have been terminated and not permanently reinstated, receipt of a copy of some or all of the same material does not give you any rights to use it.
10. FUTURE REVISIONS OF THIS LICENSE
The Free Software Foundation may publish new, revised versions of the GNU Free Documentation License from time to time. Such new versions will be similar in spirit to the present version, but may differ in detail to address new problems or concerns.
See http://www.gnu.org/copyleft/.
Each version of the License is given a distinguishing version number.
If the Document specifies that a particular numbered version of this License "or any later version" applies to it, you have the option of following the terms and conditions either of that specified version or of any later version that has been published (not as a draft) by the Free Software Foundation. If the Document does not specify a version number of this License, you may choose any version ever published (not as a draft) by the Free Software Foundation. If the Document specifies that a proxy can decide which future versions of this License can be used, that proxy's public statement of acceptance of a version permanently authorizes you to choose that version for the Document.
11. RELICENSING
"Massive Multiauthor Collaboration Site" (or "MMC Site") means any World Wide Web server that publishes copyrightable works and also provides prominent facilities for anybody to edit those works.
A public wiki that anybody can edit is an example of such a server. A "Massive Multiauthor Collaboration" (or "MMC") contained in the site means any set of copyrightable works thus published on the MMC site.
"CC-BY-SA" means the Creative Commons Attribution-Share Alike 3.0 license published by Creative Commons Corporation, a not-for-profit corporation with a principal place of business in San Francisco, California, as well as future copyleft versions of that license published by that same organization.
"Incorporate" means to publish or republish a Document, in whole or in part, as part of another Document.
An MMC is "eligible for relicensing" if it is licensed under this License, and if all works that were first published under this License somewhere other than this MMC, and subsequently incorporated in whole or in part into the MMC, (1) had no cover texts or invariant sections, and (2) were thus incorporated prior to November 1, 2008.
The operator of an MMC Site may republish an MMC contained in the site under CC-BY-SA on the same site at any time before August 1, 2009, provided the MMC is eligible for relicensing.
Common Acronyms and Abbreviations
More on User Manual/Common Acronyms and Abbreviations
The Ryzom Glossary can be very handy.
Credits
- This page is made from the original document produced by anonymous volunteer contributors
- David M. Blaies, editor.
- and
- Edited for fact-checking and style by Cerulean Tryker and others.
- Copyright (C) 2013 by David M. Blaies.
- Permission is granted to copy, distribute and/or modify this document under the terms of the GNU Free Documentation
- License, Version 1.3 or any later version published by the Free Software Foundation; with no Invariant Sections, no
- Front-Cover Texts, and no Back-Cover Texts. A copy of the license is included in the section entitled "GNU Free
- Documentation License".
- “Ryzom” is a copyrighted name of Winch Gate Property Limited, Potamos, Cyprus, successor to the Nevrax Corporation
- Images are courtesy of The Ryzom Services